
This guide covers the complete workflow for setting up a new well and running your first rod pump simulation in PetroBench. You can also import existing project files from RodStar or S-Rod instead of entering data manually.
Create the Well
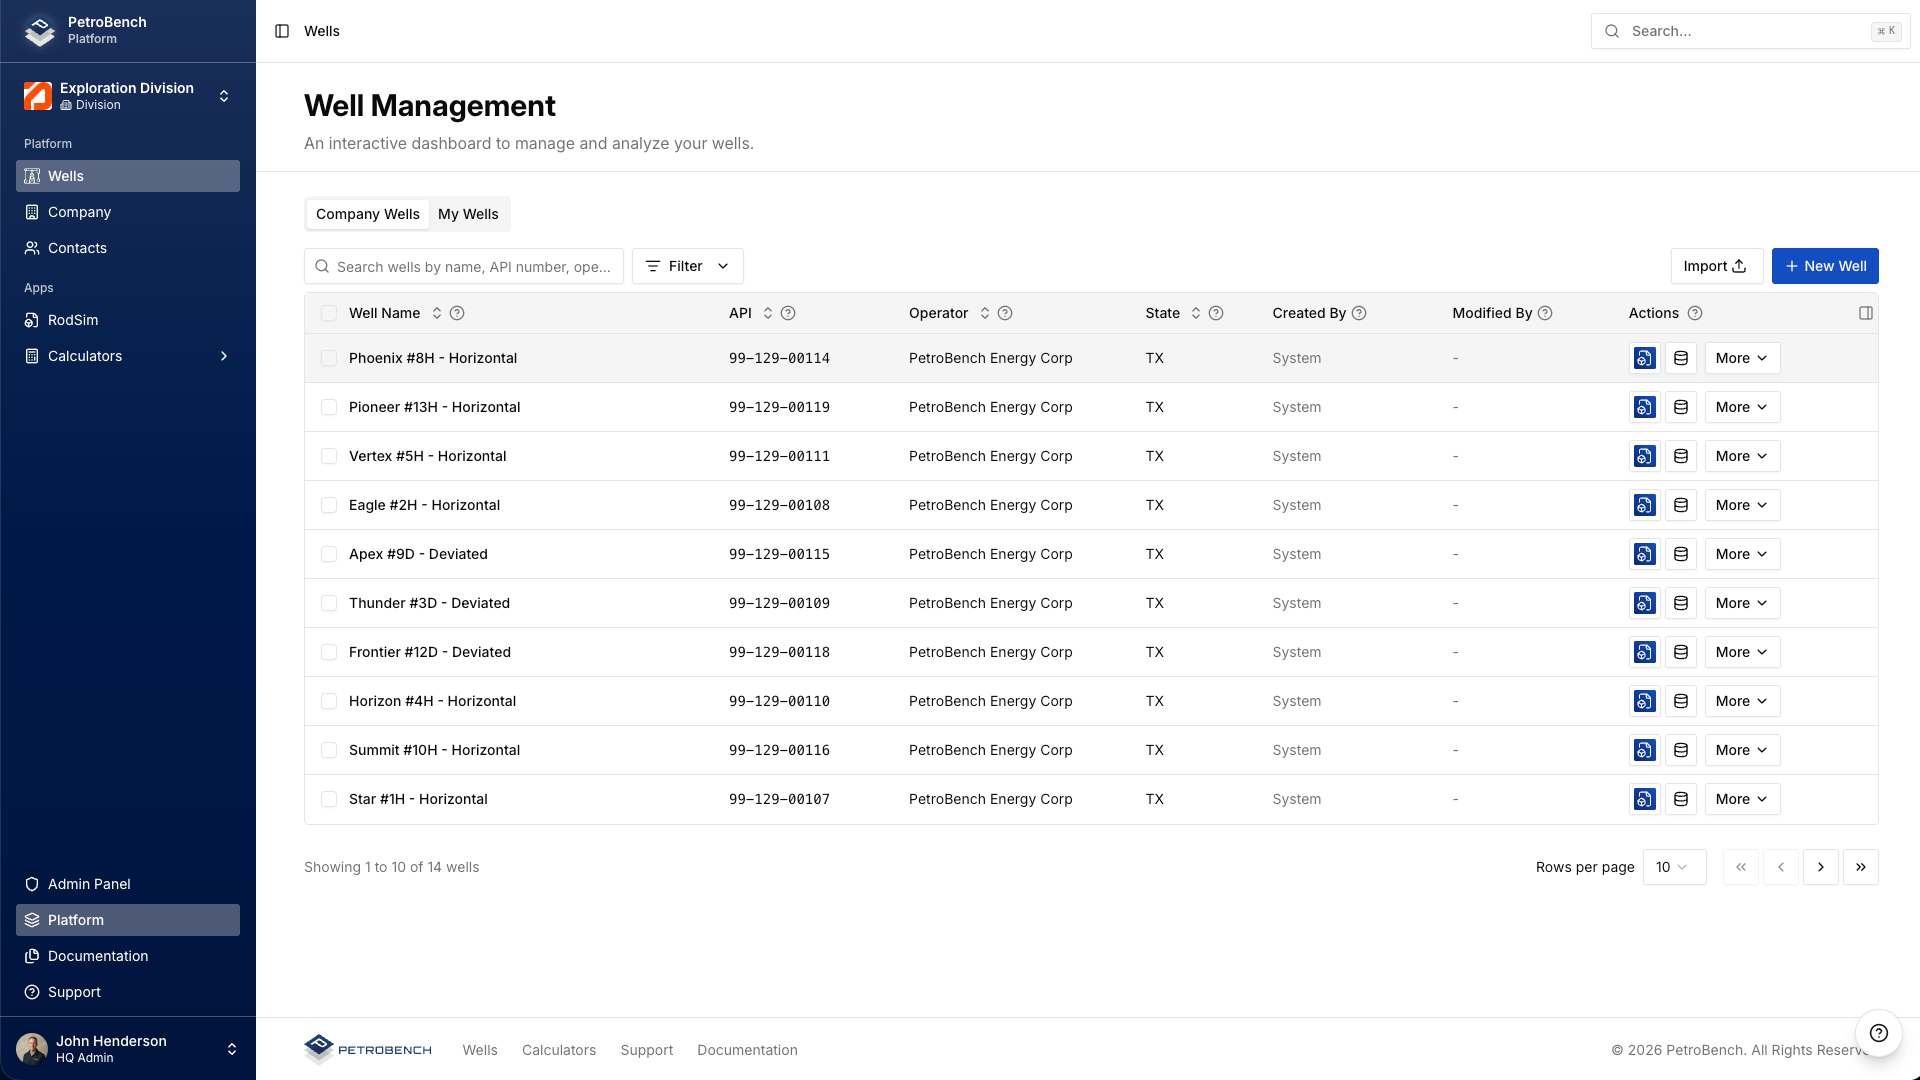
Navigate to Wells and click New Well. Enter the well name and select Add Well. You can fill in the remaining well data afterward.
On the well detail page, complete the identification fields:
- API Number: full 14-digit number (e.g. 42-301-12345-0000)
- Operator / Lease / Field: select from existing entries or create new ones
- Location: latitude and longitude in decimal degrees
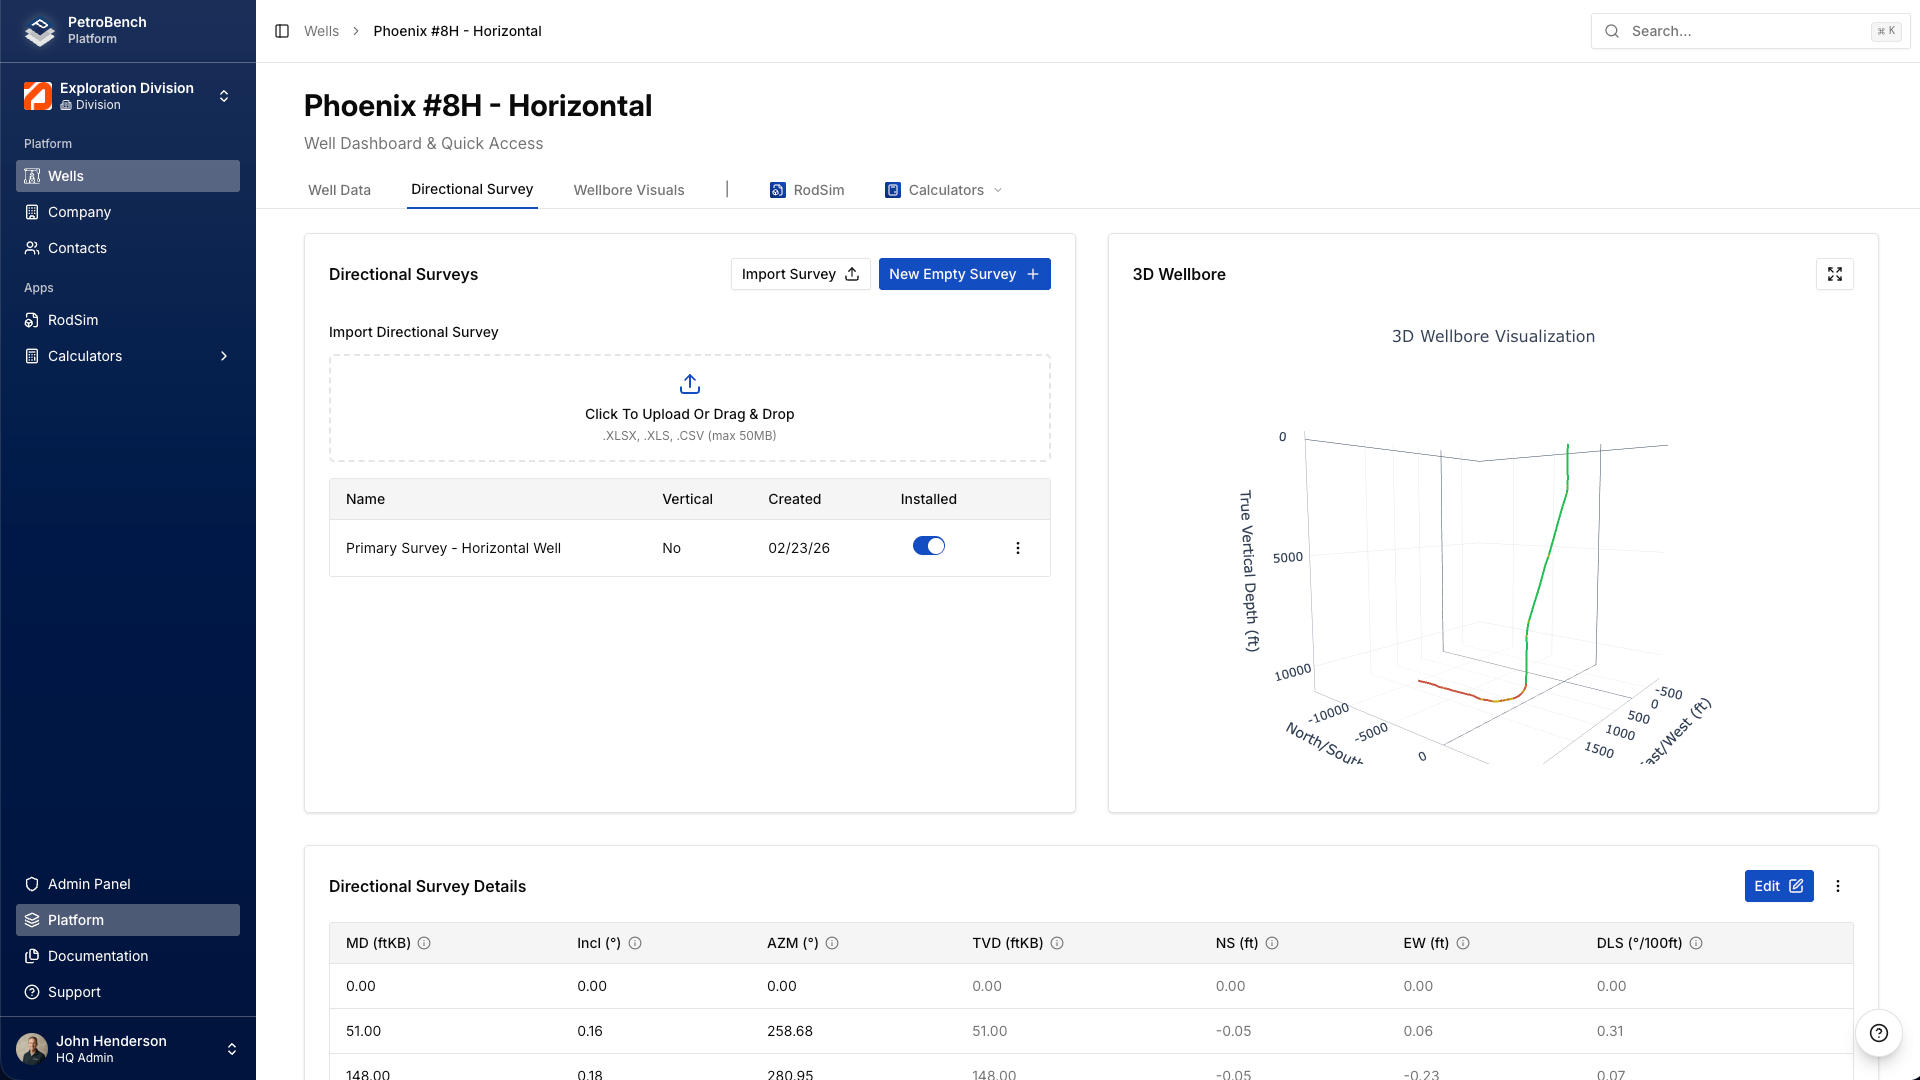
Upload the Directional Survey
Open the Directional Survey tab within your well. The survey defines the wellbore trajectory and directly affects rod loading and side load calculations. Vertical wells can skip this step.
Click Import Survey and upload your CSV file. PetroBench maps the measured depth, inclination, and azimuth columns automatically. Verify the preview and confirm.
To enter data manually, click New Empty Survey and add each station row. Include the surface station (MD = 0, Inc = 0, Azi = 0) as the first row.
Create a New Simulation
Open the RodSim tab on the well page and click New Simulation. This creates a blank simulation project where you'll configure the equipment and operating parameters.
Configure Simulation Preferences
The Simulation Preferences tab is where you define the operating conditions:
- Pumping Unit: select from the equipment library, filterable by manufacturer and model
- Stroke Rate (SPM): target pumping speed (typical range: 4-12)
- Stroke Length: surface stroke length in inches
- Fluid Gradient: in psi/ft, based on your fluid properties
- Pump Fill: percentage (100% for fully filled pump)
- Directional Survey: select the survey you uploaded earlier
Set Up the Tubing String
Open the Tubing Data tab. Set the PSN depth (measured depth to the pump). If a directional survey is loaded, PetroBench auto-calculates TVD and inclination at depth.
Define each tubing section:
- Nominal Size: typically 2-3/8 or 2-7/8
- Weight: in lb/ft
- Grade: tubing steel grade
- Depth Interval: from/to measured depth for each section
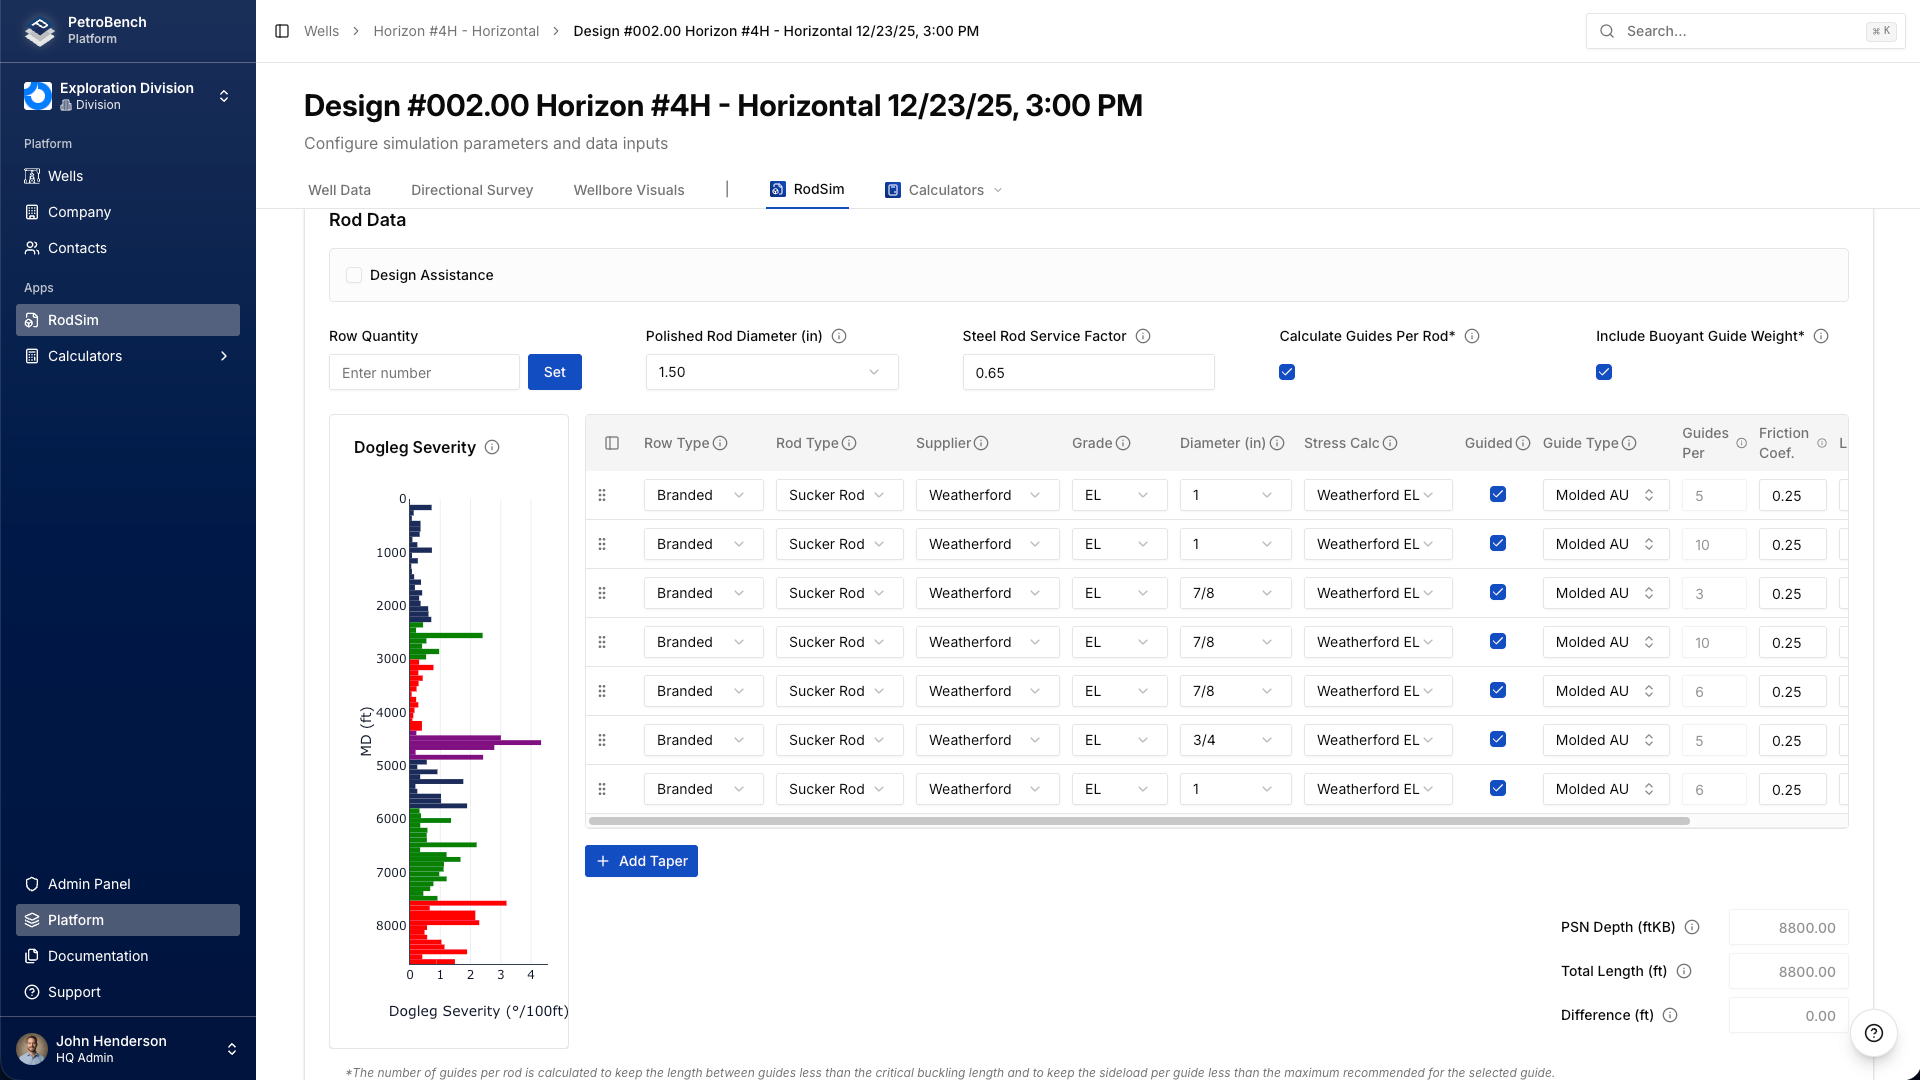
Configure the Rod String
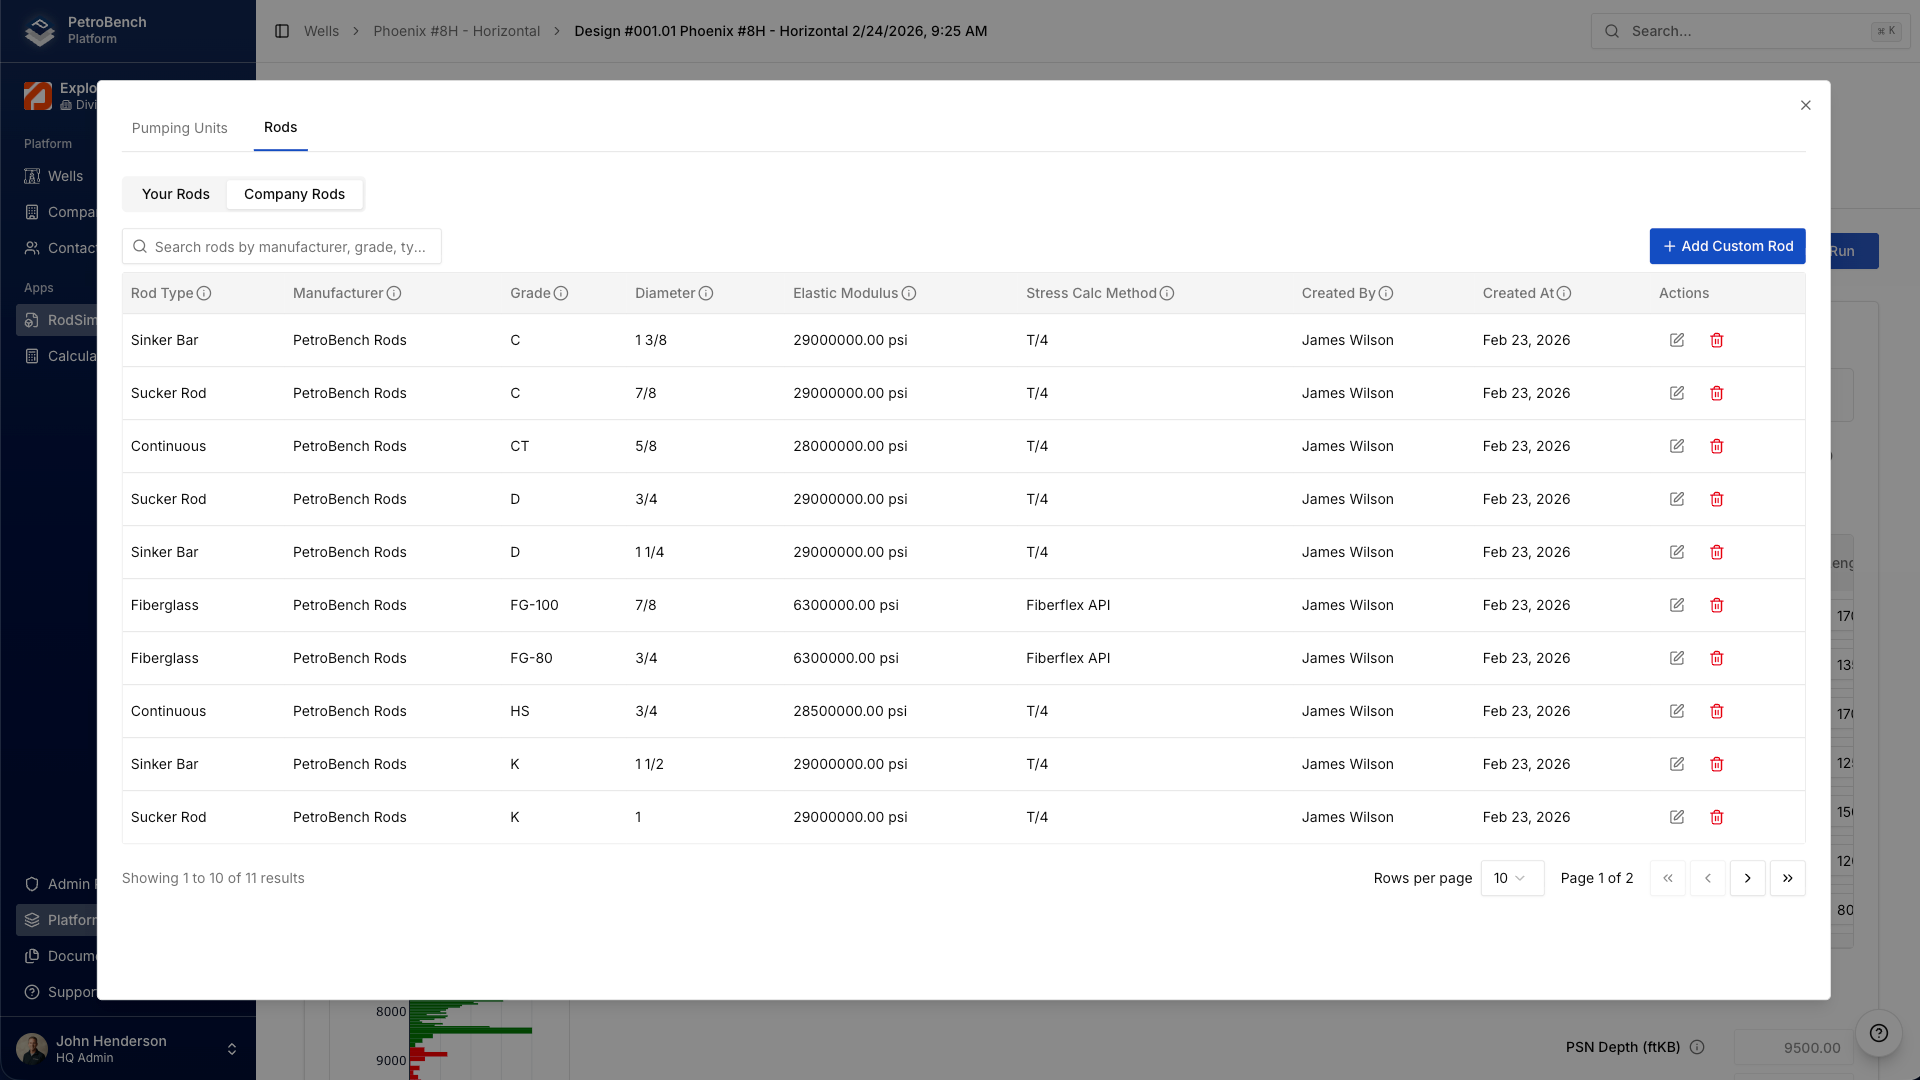
Open the Rod Data tab. Build the rod assembly from top to bottom by clicking Add Rod for each taper section. For each taper, specify:
- Rod Type: Sucker Rod, Sinker Bar, or Continuous Rod
- Manufacturer and Grade: select from the equipment library
- Diameter: in fractions of an inch (7/8, 3/4, 5/8)
- Length: in feet for that taper section
For deviated wells, configure the polished rod size and rod guides per taper. PetroBench calculates guide spacing automatically based on dogleg severity.
The total rod length should match the pump setting depth. PetroBench flags any mismatch before the simulation runs.
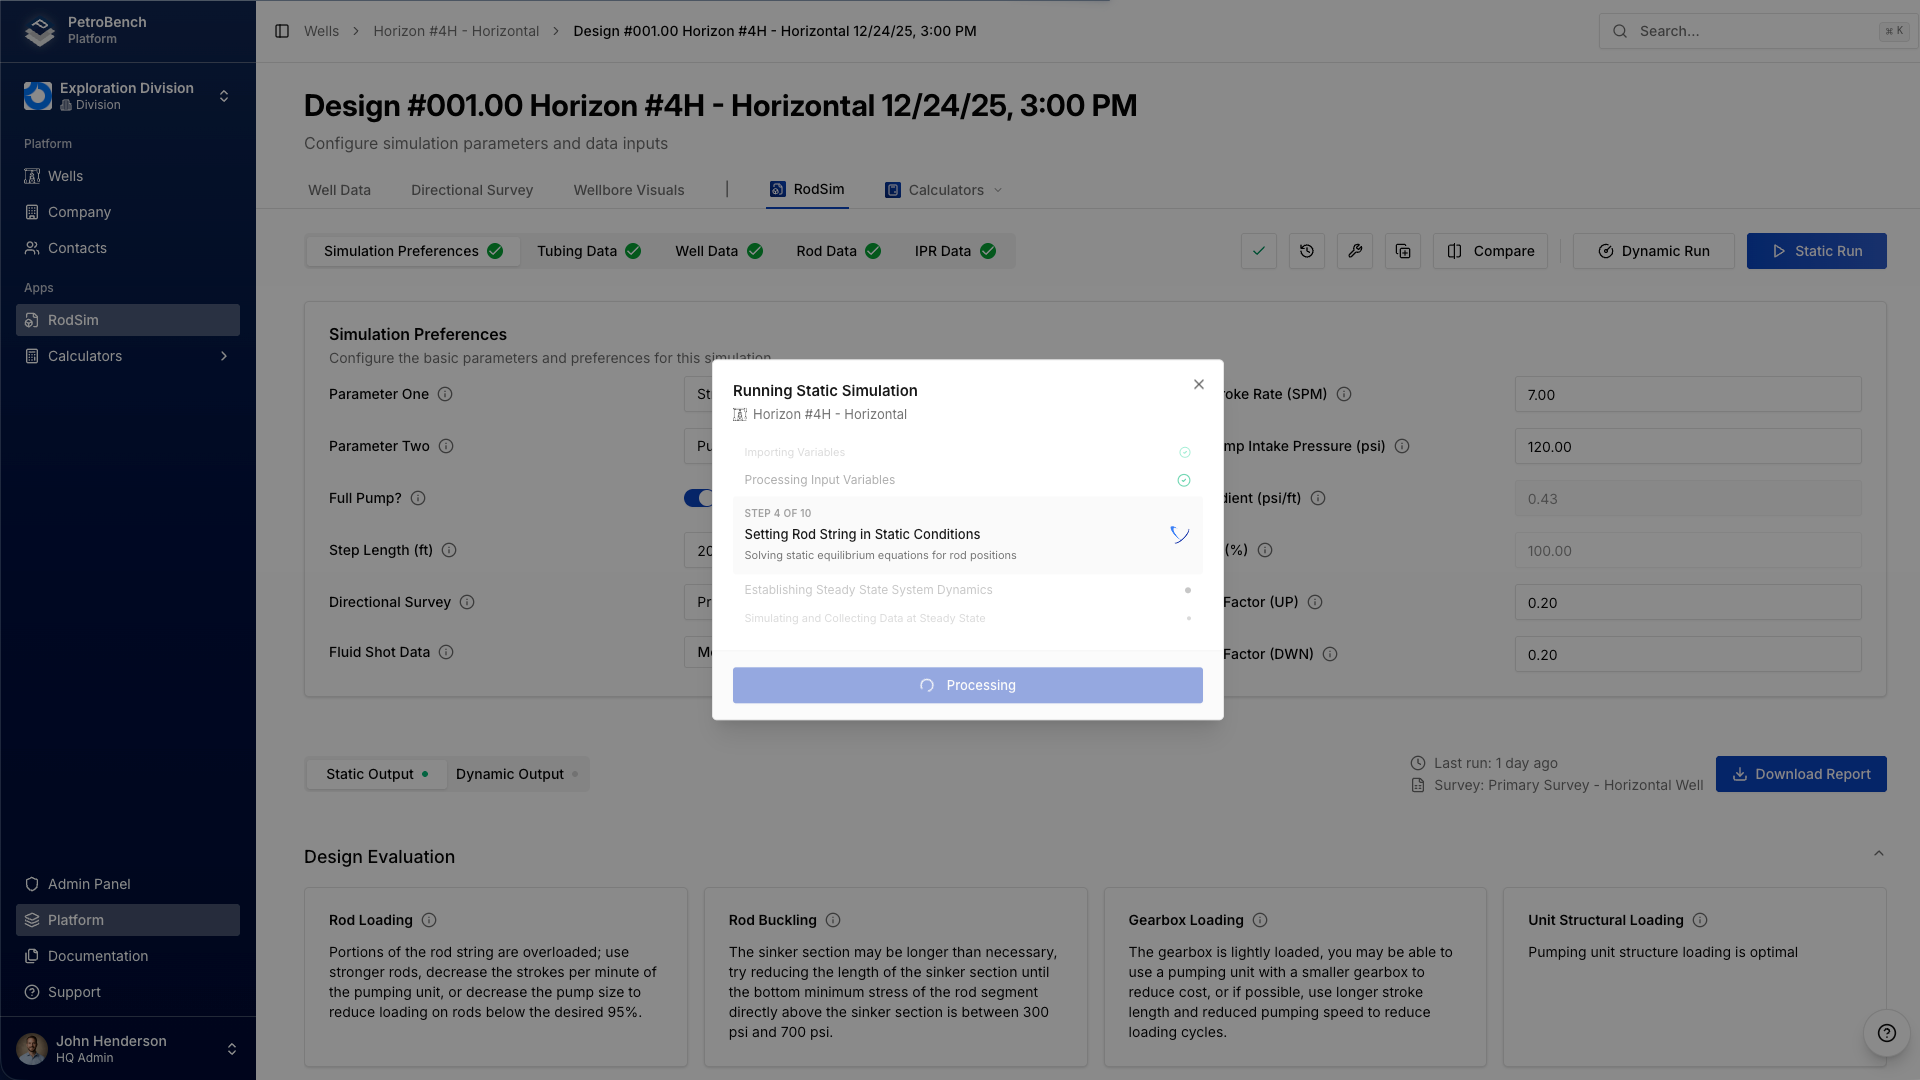
Run the Simulation
Click Run Simulation. PetroBench validates all inputs and reports any configuration issues before starting. The simulation typically completes in 10-30 seconds.
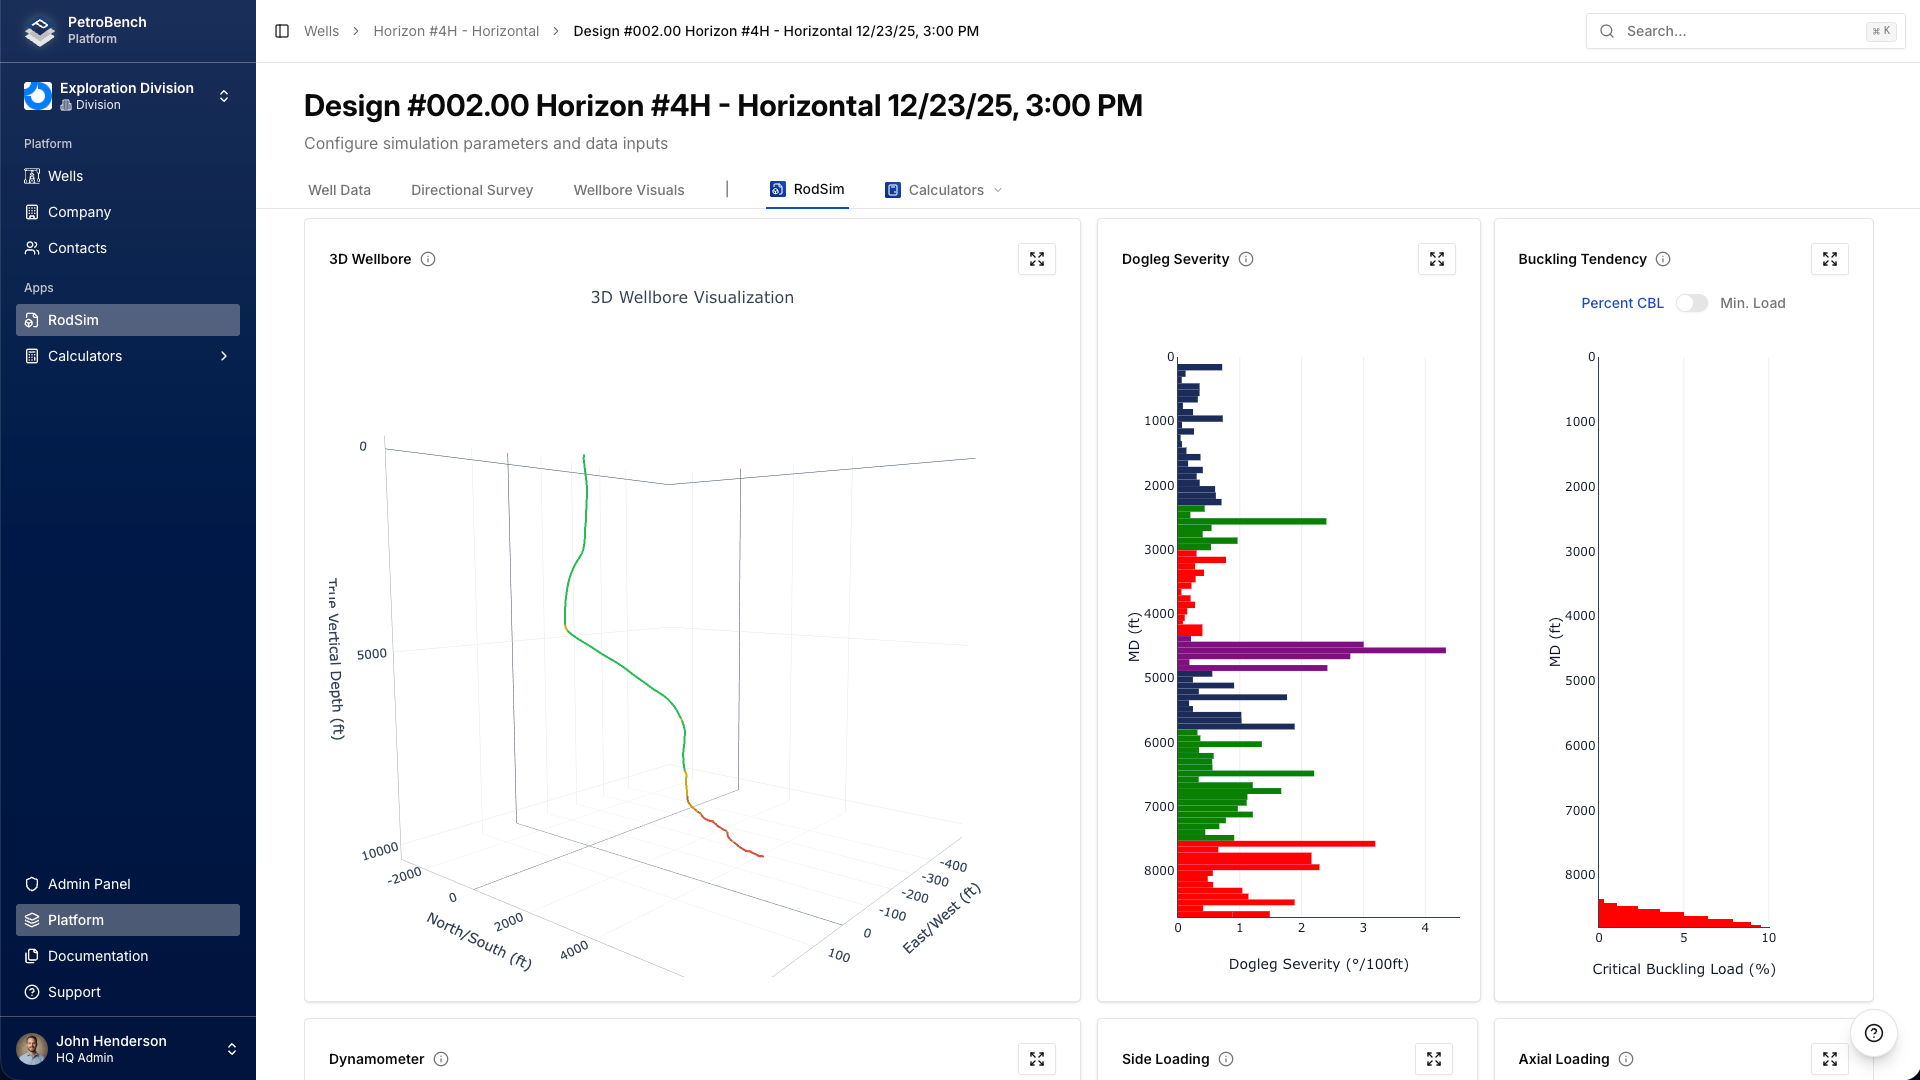
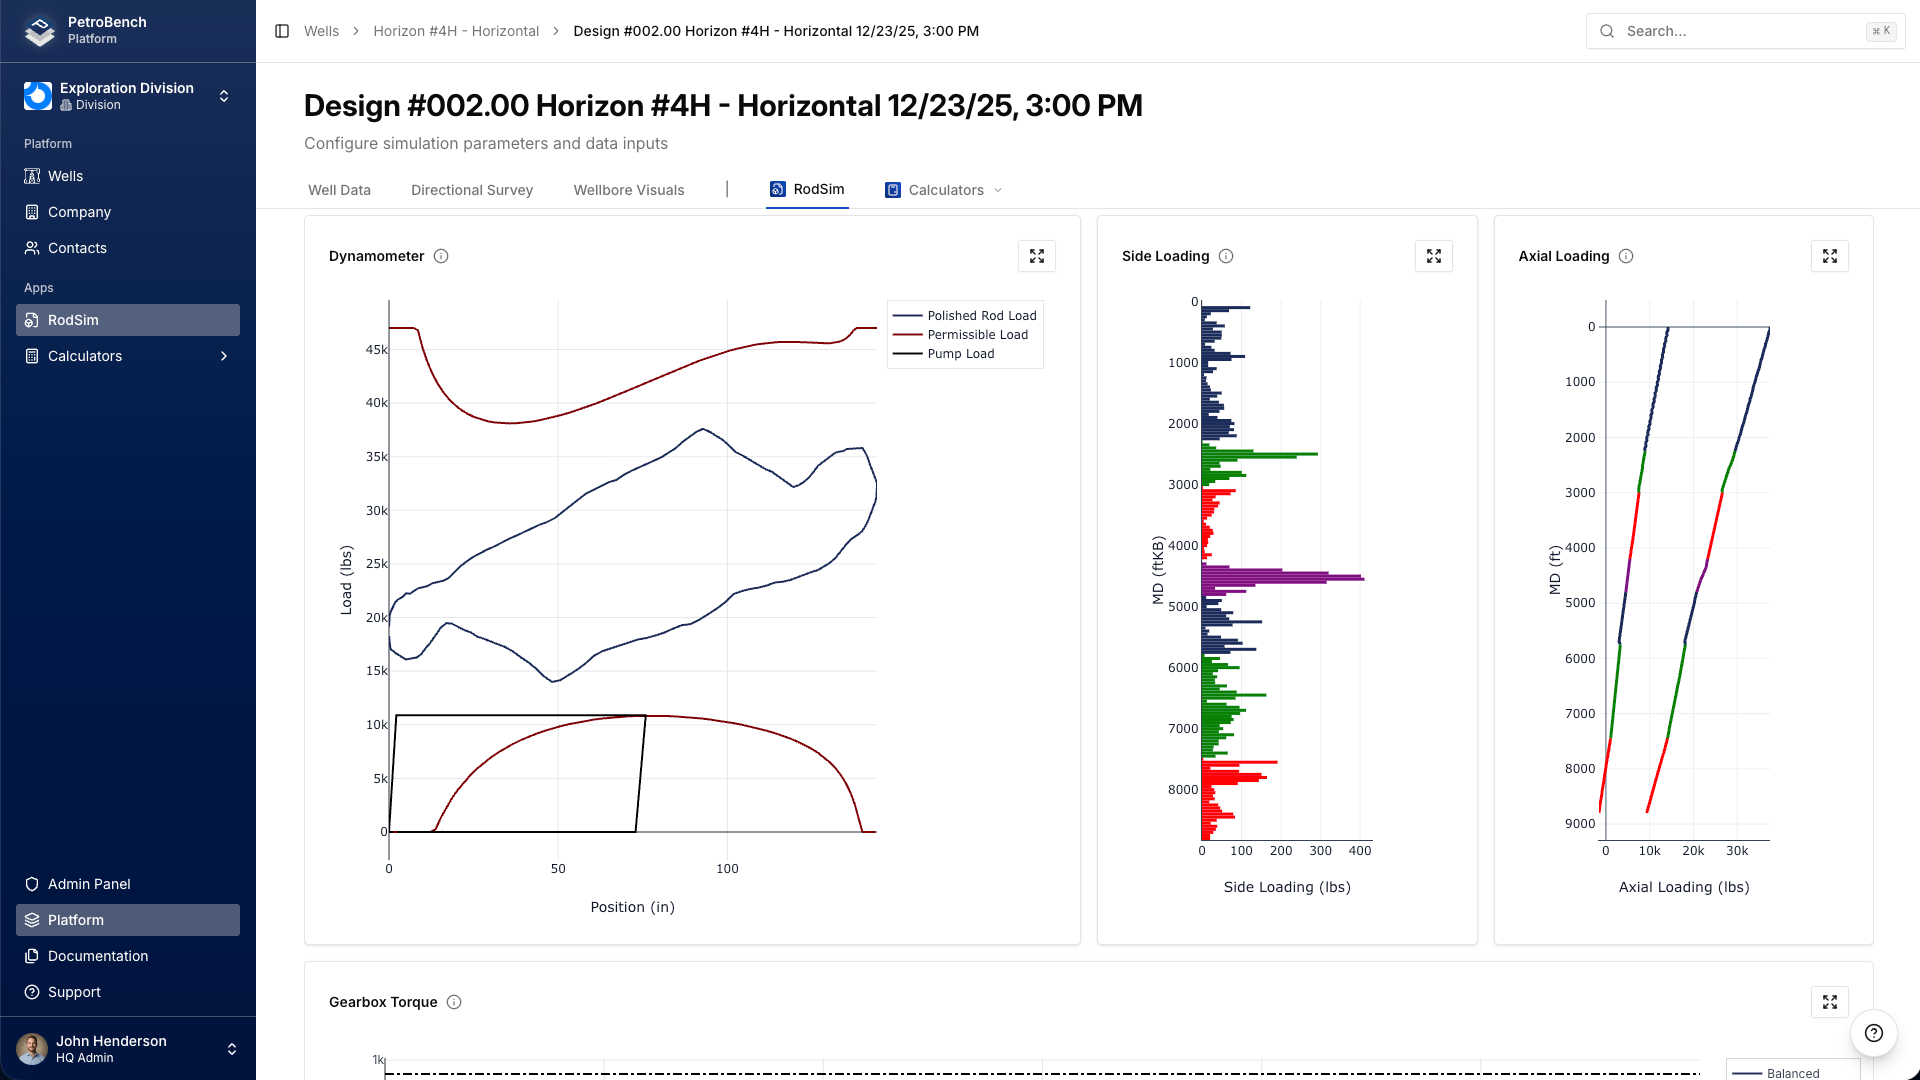
Review Results
The results page includes:
- Design Evaluation: recommendations for rod loading, buckling, gearbox loading, and structural loading
- Calculated Results: production rate, PPRL, MPRL, system efficiency, and pumping unit analysis
- Rod String Summary: stress data per taper section with Goodman diagram limits
- Dynamometer Cards: surface and downhole cards, side loading, and axial loading charts
- 3D Wellbore Visualization: rod string within the wellbore trajectory

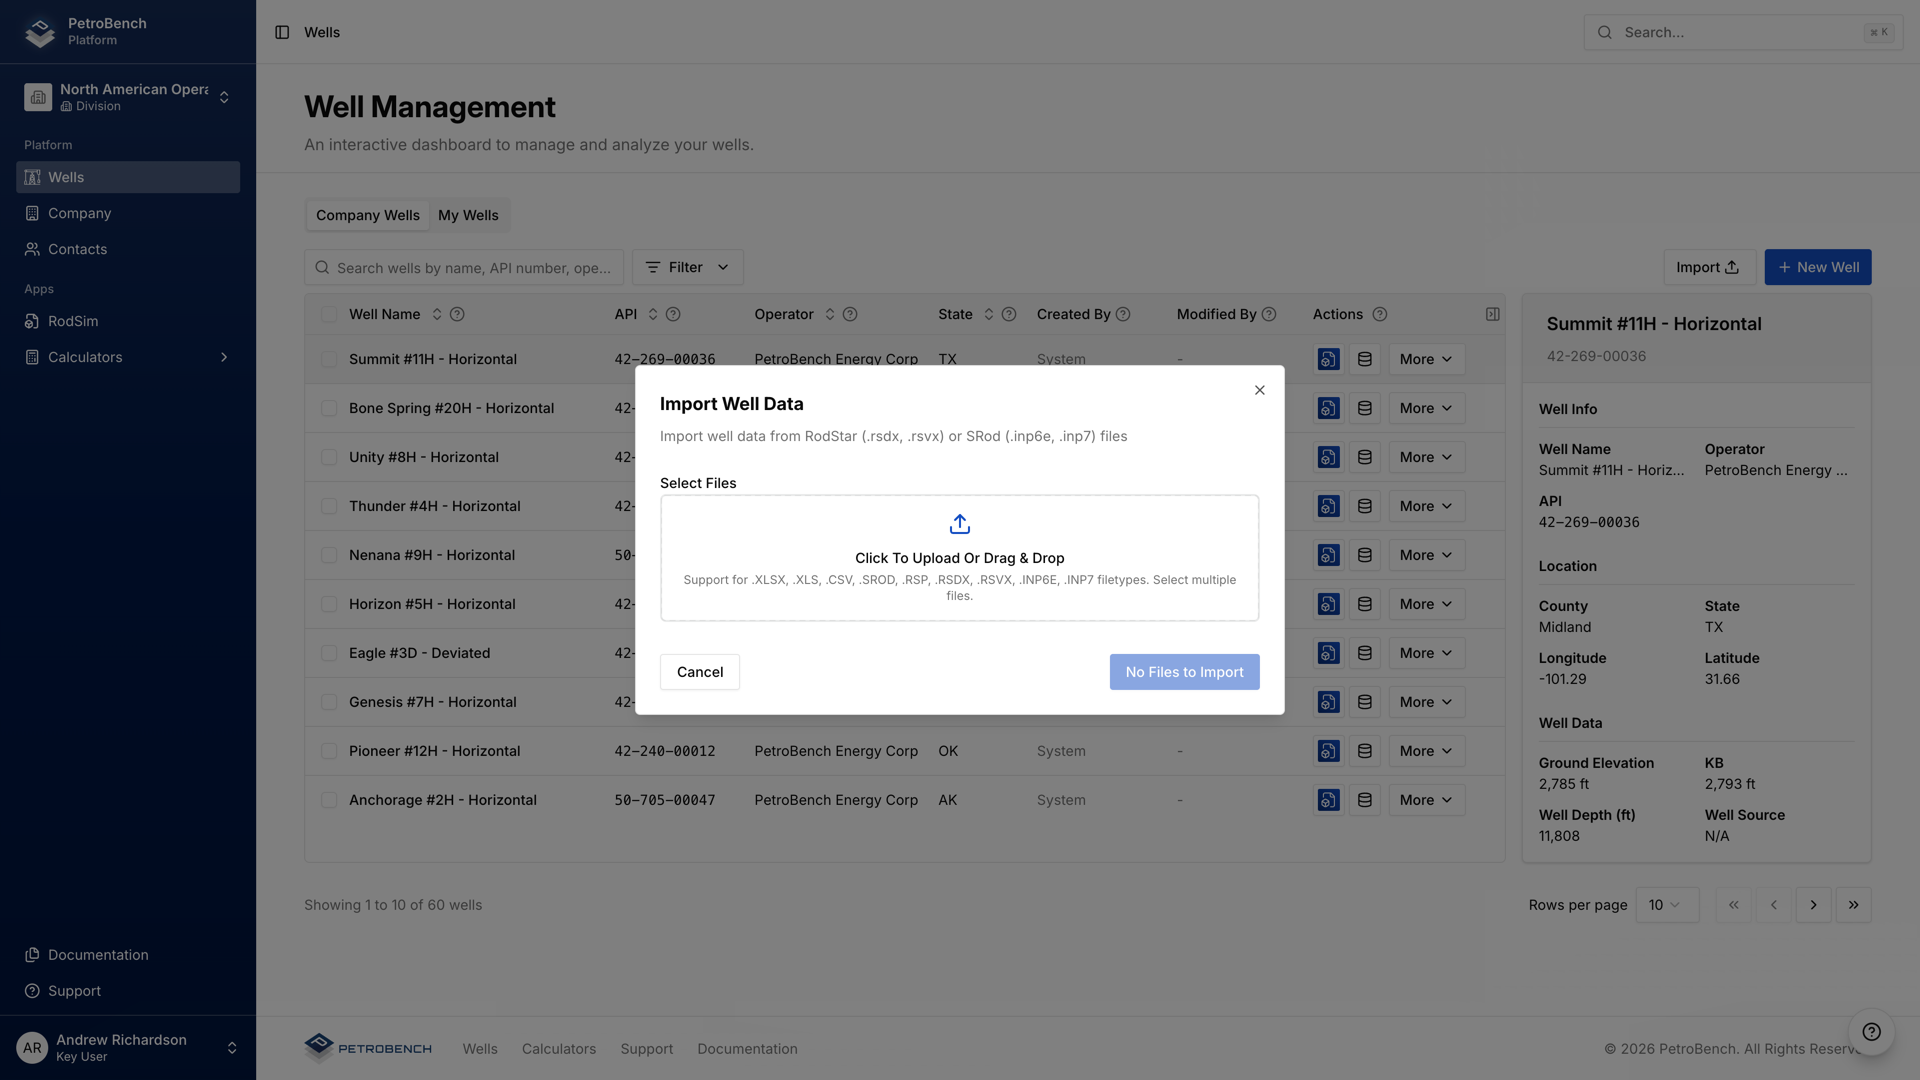
Alternative: Import from RodStar or S-Rod
Instead of manual entry, you can import existing project files. Navigate to Wells > Import and select your files:
- RodStar: .rsdx and .rsvx files
- S-Rod: .inp6e and .inp7 files
PetroBench maps the well data, directional survey, rod string, and operating parameters from the imported file. Review the imported data and adjust as needed before running the simulation.